Nextcloud is a platform designed for content collaboration that offers various features to manage files. It includes real-time document editing, video chat, groupware, and is available on desktop, mobile, and web. Nextcloud is an open source software that was created by some of the original ownCloud developers after forking from the ownCloud open source software. In this tutorial, you will learn how to install and configure Nextcloud on your Debian 11 server.
Before proceeding with the task, you need to have a Debian 11 server with root access or a sudo user. If you don’t already have one, you can obtain it from our website. Additionally, you can follow our guide on Connecting to your VPS with SSH and improving security to establish a secure connection to your server via SSH and create a sudo user.
Start by updating the packages in the package manager cache to the latest available versions using the following command:
To install Nextcloud, we can use the Snap packaging tool. This tool allows software organizations to publish their software in a single package, along with all the necessary dependencies, configurations, and auto-updating features. To get started, we need to install the Snap packaging tool. We can do this by running the following command:
Run the following command to install the Nextcloud snap package:
This will download and install Nextcloud on your system, and you will receive an output similar to the following:
To confirm that the installation was successful, run the following command:
You should receive the following output:
For more information on the Nextcloud package, you can use the following command:
This will give you information such as the publisher, contact information, commands, services, and other metrics.
Although you can configure your Nextcloud admin account on the web interface, it is best to avoid making your unsecured Nextcloud configuration accessible on the Internet.
You can use the nextcloud.manual-install command to configure a Nextcloud admin account directly from the command line by passing it a username and a password like so:
Make sure to replace your_user and your_password with your preferred username and password.
As a result, you should see the following output:
With this, you now need to add your server’s domain name and IP address to your Nextcloud trusted domains.
By default, Nextcloud only responds to web requests that are sent to the localhost hostname. This makes us unable to access Nextcloud via our server’s IP address or our domain name. To solve this and make Nextcloud accessible to the outside world, we’ll need to change the trusted domain setting.
To add trusted domain to Nextcloud, run the following command:
Repeat this command for each domain name of yours with an incremented number, and make sure to replace example.com with your domain name or IP address. For example to add another domain:
And to add your IP address:
Note the increments in the trusted_domains parameter.
To see all your trusted domains, use the following command:
Next, set up a self-signed certificate for Nextcloud using the following command:
You should receive the following output:
With this, you can now access your Nextcloud server throughout the Web.
With Nextcloud configured, navigate to your domain name or IP with your web browser:
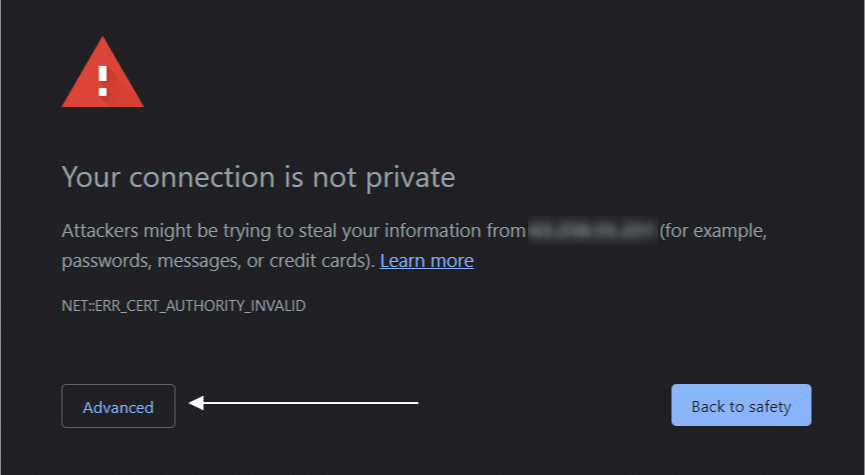
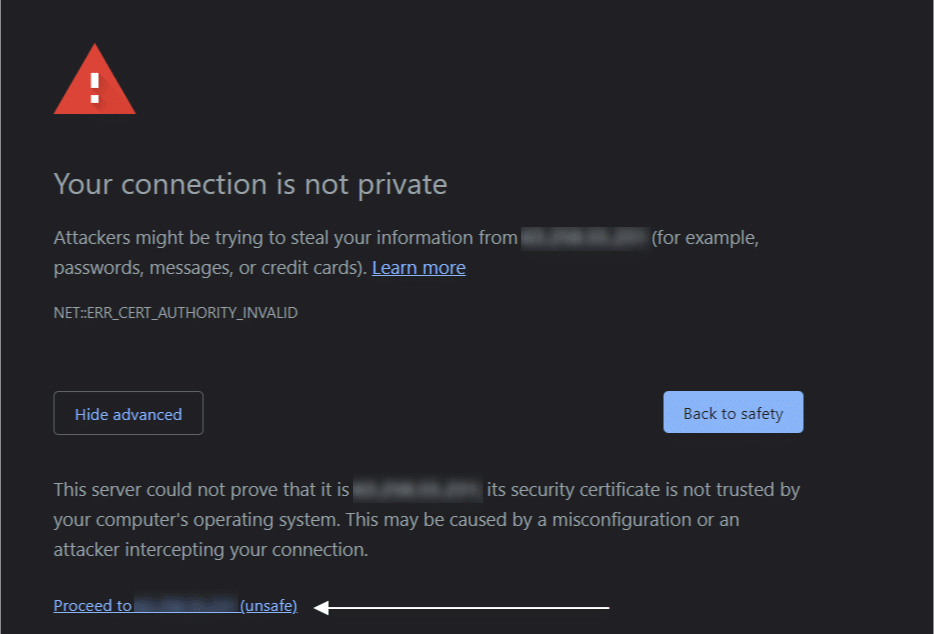
If you have not installed an SSL certificate from a trusted Certificate Authority such as Let’s Encrypt, you may see a “Not Secure” message indicating that your server’s connection is not secure. This is a normal error message that appears because your website is secured by a self-signed certificate, which the browser does not recognize as it is not one of its known certificate authorities. To proceed, you will need to click on the Advanced or More information button depending on the browser you are using and then select the option to proceed. The Google Chrome browser provides an example of this error message.
If you see a message saying that Nextcloud is in Maintenance Mode, don’t worry. Just wait for a few minutes while Nextcloud sets everything up, and then refresh the page. After that, you will be redirected to a login screen where you can use the username and password you have previously set up to access your account.
Congratulations on successfully installing Nextcloud on your Debian 11 server! You can now manage your files and collaborate with others on the cloud, using your private server.
In the Nextcloud web dashboard, you can manage your files, customize your Nextcloud experience, and set your location for weather data. You can also explore different features and pages to learn more about what you can accomplish with Nextcloud.
Please note that what we’ve covered in this article is suitable for testing purposes and personal use. If you want to publish your site to production and securely process your customers’ online transactions, we suggest you check out our “Secure Your Site Using HTTPS with Self-Signed or CA SSL Certificates on Ubuntu 22.04” blog article. This article explains in detail how to secure your site with SSL certificates. For more information on Nextcloud, feel free to visit their official website.