SSD Grow

SSD_Grow

Installing WordPress Using LAMP on Ubuntu 18.04

WordPress with LAMP is a popular web hosting setup. Although there are other software stack options available (some of our team prefers LEMP), WordPress with LAMP is widely used for websites across the globe. In this tutorial, we will guide you through the process of installing WordPress on Ubuntu 18.04 using a LAMP stack, so you can easily serve your website to the world.
WordPress, a popular content management system (CMS), is used by over 34% of all websites online today, which is equivalent to over 22 million websites. It has a dominant market share of 60% among websites using a CMS. Apache, a critical component of the LAMP stack, is the most widely used web server globally. Therefore, it is essential for developers and individuals who want to host their blog or website to have a WordPress/LAMP installation.

Install WordPress on Ubuntu 18.04 Using a LAMP

Requirements for Setting Up WordPress on Ubuntu 18.04

  • LAMP stack is an acronym for Linux, Apache, MySQL, and PHP. WordPress requires a web server, a database engine, and PHP for both front-end and back-end development, and LAMP provides this functionality for serving dynamic content.

  • SSH access to the server
  • Step 1: Create a database for WordPress user

    WordPress ships a bundle of numerous files and those files need to be stored in a database.
    So, your first step towards installing WordPress is to setup MySQL database to handle these files.
    To do this, let’s log in to MySQL as a root user, using the command:

    mysql -u root -p

    You’ll then be prompted for the password that you set during the set-up of the MySQL database system.
    Once logged in, you need to create a new database that will accommodate WordPress files during and after the installation process. You can name it whatever you wish, but to keep things simple, we will call it WordPress DB in this guide.
    To create the database, run the following command.

    mysql> CREATE DATABASE wordpressdb;

    Always remember to terminate MySQL statements with a semi-colon “;”
    With the database in place, you need to create a new MySQL user account that will have exclusive access to the database.
    Let’s also grant the user full access to the database and set a strong password. For this guide, we will create a user called admin-user.
    To do that, execute the following command

    mysql> mysql> GRANT ALL ON wordpress.* TO 'admin-suser'@'localhost' IDENTIFIED BY 'PASSWORD';

    Remember to replace the PASSWORD string with a strong password.
    At this point, we’ve created a database and a user account specifically for WordPress.
    To apply the changes in MySQL instance, we need to run the command below

    mysql> FLUSH PRIVILEGES;

    Then we’ll exit the MySQL instance by running the command

    mysql> EXIT;

    Step 2: Install additional PHP extensions

    LAMP stack requires only a minimal set of extensions for PHP to communicate with MySQL database server. However, WordPress and many of its plugins require additional extensions to function without complications.
    With that in mind, we’re now going to install additional PHP extensions for WordPress.
    First, update the system:

    # sudo apt update

    Next, install the additional PHP extensions:

    # sudo apt install php-curl php-gd php-mbstring php-xml php-xmlrpc php- soap php-intl php-zip

    To load these extensions, restart Apache web server by running the following command:

    # sudo systemctl restart apache2

    Step 3: Download WordPress

    With all the prerequisites in place, let’s go ahead and download WordPress.
    For security reasons, I recommend always downloading WordPress from its official repository:
    First Navigate to /var/www/ directory

    # cd /var/www/```

    Then download the zipped folder using the command

    # curl -O https://wordpress.org/latest.tar.gz

    Extract the tarball file

    # tar -xvf latest.tar.gz

    The extraction of the tarball file yields a folder labeled WordPress.
    This is the folder that contains all the WordPress configuration files. At this point, it’s safe to delete the tarball file you just downloaded from the WordPress repository.

    # rm latest.tar.gz

    Step 4: Configure the wordpress directory

    Before we proceed to the next step, we need to adjust ownership and file permissions of the WordPress directory.
    Let’s assign file ownership to all the files in the WordPress directory using the

    # sudo chown -R www-data:www-data /var/www/wordpress

    Next, we’ll set the correct permissions as shown:

    # sudo find /var/www/wordpress/ -type d -exec chmod 750 {} \;
    # sudo find /var/www/wordpress/ -type f -exec chmod 640 {} \;

    We also need to rename the sample configuration file in the WordPress directory to a filename it can read from:

    # cd /var/www/wordpress
    # mv wp-config-sample.php wp-config.php

    Next, we will open the wp-config.php file using the default text editor Vim.

    # vim wp-config.php

    Now scroll down and locate the database settings as shown below. Be sure to fill in the WordPress database name, database user, database password and hostname.

    // ** MySQL settings - You can get this info from your web host ** //
    /** The name of the database for WordPress */
    define('DB_NAME', 'wordpressdb');

    /** MySQL database username */
    define('DB_USER', 'admin-user');

    /** MySQL database password */
    define('DB_PASSWORD', 'StrongPassword');

    /** MySQL hostname */
    define('DB_HOST', 'localhost');

    /** Database Charset to use in creating database tables. */
    define('DB_CHARSET', 'utf8');

    /** The Database Collate type. Don't change this if in doubt. */
    define('DB_COLLATE', '');

    Save and exit the configuration file.
    You also need to generate security keys to provide additional security to your WordPress installation. WordPress provides an automatic generator for these keys to eliminate the need for generating them ourselves.
    To generate these values from WordPress secret generator, simply run the command:

    # curl -s https://api.wordpress.org/secret-key/1.1/salt/

    Note: The command gave us the output below. DO NOT USE THESE VALUES, you need to copy the unique values that you generated.

    define('AUTH_KEY', 'UV>...SAMPLE ONLY...COPY YOUR OWN VALUES...mL)');
    define('SECURE_AUTH_KEY', 'bn(UV>...SAMPLE ONLY...COPY YOUR OWN VALUES...emL)zx');
    define('LOGGED_IN_KEY', '-naUV>...SAMPLE ONLY...COPY YOUR OWN VALUES...emL{fY');
    define('NONCE_KEY', '{xNwUV>...SAMPLE ONLY...COPY YOUR OWN VALUES...emL8Fq');
    define('AUTH_SALT', 'j+;UV>...SAMPLE ONLY...COPY YOUR OWN VALUES...emLZpu');
    define('SECURE_AUTH_SALT', '0M=UV>...SAMPLE ONLY...COPY YOUR OWN VALUES...emL*xC');
    define('LOGGED_IN_SALT', 'G&2UV>...SAMPLE ONLY...COPY YOUR OWN VALUES...emLps+');
    define('NONCE_SALT', '2gZUV>...SAMPLE ONLY...COPY YOUR OWN VALUES...emLh/L');

    Copy the unique output that you’ve generated.
    Once again, open the WordPress configuration file wp-config.php

    # vim wp-config.php

    Scroll and locate the section that contains the dummy values, which looks like this:

    define('AUTH_KEY', 'put your unique phrase here');
    define('SECURE_AUTH_KEY', 'put your unique phrase here');
    define('LOGGED_IN_KEY', 'put your unique phrase here');
    define('NONCE_KEY', 'put your unique phrase here');
    define('AUTH_SALT', 'put your unique phrase here');
    define('SECURE_AUTH_SALT', 'put your unique phrase here');
    define('LOGGED_IN_SALT', 'put your unique phrase here');
    define('NONCE_SALT', 'put your unique phrase here');

    Delete those values and paste the security keys that WordPress generated for you.
    Now save and exit the configuration file.

    Step 5: Modify Apache configuration

    In this step, we need to make a few adjustments to the default configuration file 000-default.conf in the path /etc/apache2/sites-available.
    Start by opening the default configuration file

    # vim /etc/apache2/sites-available/000-default.conf

    Next, locate the DocumentRoot attribute and change it from /var/www/html to /var/www/WordPress.
    Copy and paste the following lines inside the Virtual Host block in the same file

    <Directory /var/www/wordpress/>
    AllowOverride All
    </Directory>
    

    Save and exit the configuration file.
    Next, you need to enable the mod_rewrite so that you can use the WordPress Permalink feature.

    # sudo a2enmod rewrite

    To verify that all went well, execute the command.

    # sudo apache2ctl configtest

    Output: Ok
    To implement the changes, restart Apache web server.

    # sudo systemctl restart apache2

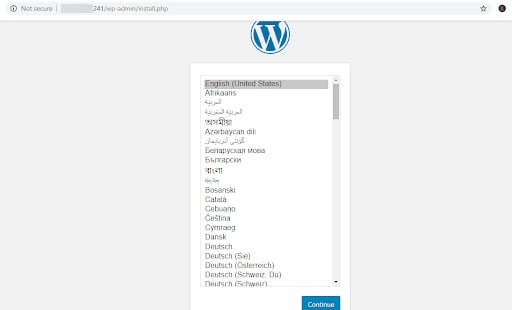
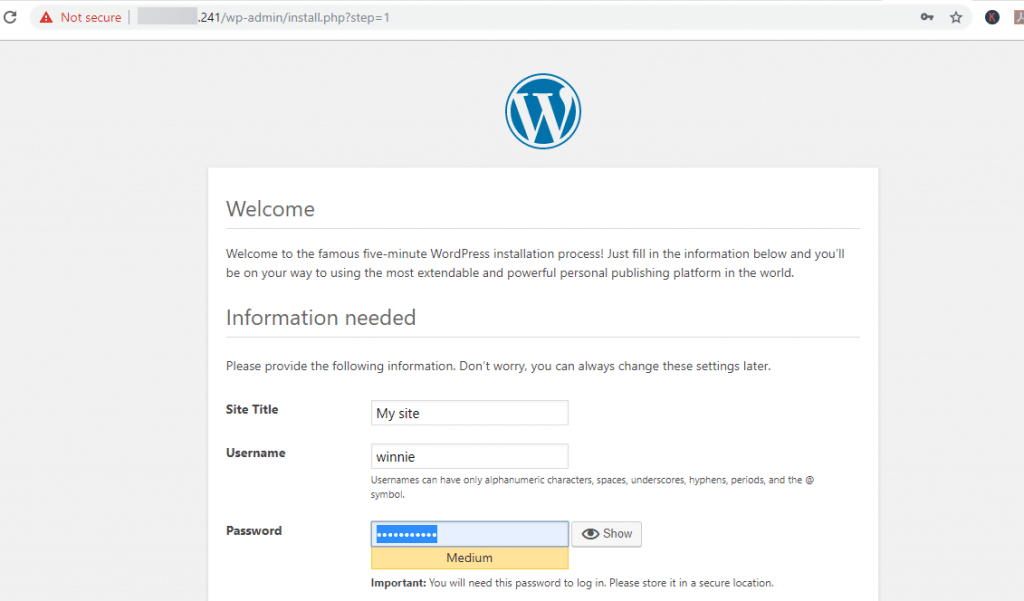
    Step 6: Run WordPress installation using the web browser

    At this point, you’ve finished all the server configurations for your WordPress installation.
    The final step is to complete the installation via a web browser.
    To do this, launch your web browser and browser your server’s IP address or domain name

    http://server_IP_address or http://YOUR-DOMAIN

    The first page will prompt you to select the language.
    Click on your preferred language and hit the ‘Continue’ button.
    In the next step fill in the additional information required such as ‘Site Name’, ‘Username’ , ‘Password’, and ‘Email address’.
    Once you’ve filled in all the required fields, click on ‘Install WordPress’
    If all goes well, you will be directed to the Login Page.

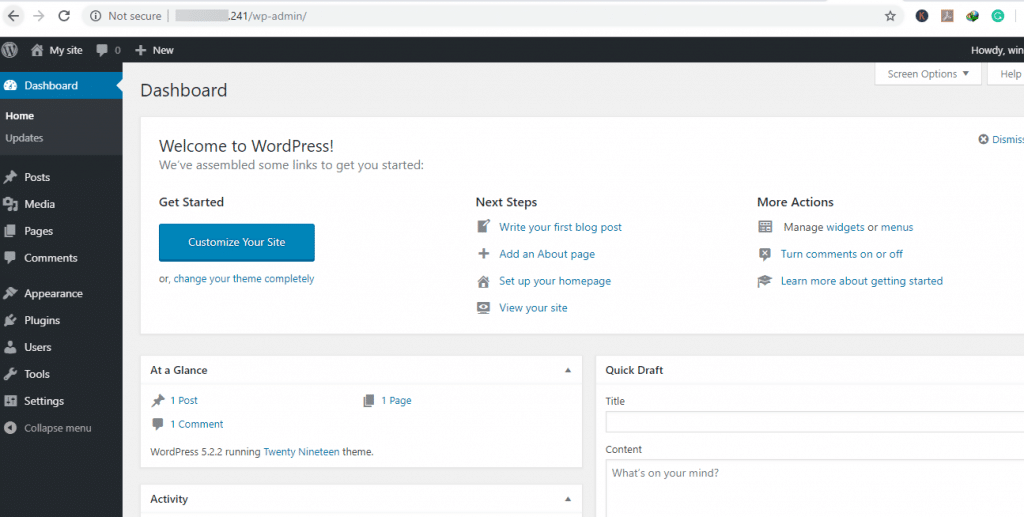
    Hit the ‘Login’ button and you’ll head to the world-famous WordPress dashboard that you see below:

    Great news! You have successfully installed WordPress with LAMP on Ubuntu 18.04 LTS. This means you are now ready to start building your website or blog. If you are new to WordPress, there are many free resources available for learning and customization. Since you were able to install LAMP and execute the WordPress setup, using WordPress should be a breeze. Get started on your site and enjoy exploring all the features WordPress has to offer!
    If you have completed this tutorial, then you may already have a server. However, if you are looking for a way to reduce your hosting expenses while improving your website’s performance, then you should consider SSD Grow’s Performance VPS Hosting. The Performance VPS Hosting comes with NVMe storage, which can significantly boost your CMS’s speed, making it feel like you have attached a rocket engine to it. You can load media-heavy webpages up to 10 times faster than with standard SSD drives. Moreover, with high-resource plans, you can host multiple websites easily and scale your business at an affordable price.

    Related Articles